
Introduction
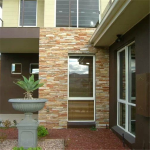
Cultured stone, also known as manufactured stone or faux stone, has become a popular choice for homeowners looking to enhance the aesthetic appeal of their properties. This versatile material offers the look and feel of natural stone while being more cost-effective and easier to install. In this comprehensive guide, we will delve into the world of cultured stone installation, covering everything from the benefits of using cultured stone to the step-by-step process of installing it yourself.
Benefits of Cultured Stone
Before we dive into the nitty-gritty of installation, let's first explore the many benefits of using cultured stone in your home improvement projects.
1. Aesthetics: Cultured stone comes in a wide variety of colors, textures, and styles, allowing you to achieve the look of natural stone without the hefty price tag. Whether you prefer the rustic charm of cobblestone or the sleek elegance of limestone, there is a cultured stone option to suit your taste.
2. Durability: Unlike natural stone, which can be prone to chipping, cracking, and fading over time, cultured stone is engineered to be highly durable and long-lasting. It is resistant to weathering, moisture, and UV exposure, making it an ideal choice for exterior applications.
3. Cost-Effectiveness: Cultured stone is typically more affordable than natural stone, making it a budget-friendly option for homeowners looking to upgrade their home's exterior or interior. Additionally, the lightweight nature of cultured stone makes it easier and less expensive to transport and install.
4. Versatility: Cultured stone can be used in a wide range of applications, from accent walls and fireplaces to exterior facades and landscaping features. Its versatility allows you to get creative with your design choices and customize your space to your liking.
Now that we've established the benefits of using cultured stone, let's move on to the step-by-step process of installing this versatile material in your home.
Step 1: Planning and Preparation
Before you begin the installation process, it's important to plan out your project carefully and gather all the necessary materials and tools. Here are some key steps to follow during the planning and preparation phase:
1. Measure the area: Measure the area where you plan to install the cultured stone to determine how much material you will need. Consider factors such as the size of the space, the shape of the area, and any obstructions that may affect the installation process.
2. Choose the right type of cultured stone: Select a cultured stone product that complements the style of your home and meets your design preferences. Consider factors such as color, texture, and size when choosing the right type of cultured stone for your project.
3. Gather the necessary tools: Make sure you have all the tools and equipment you will need for the installation process, including a trowel, level, tape measure, saw, safety goggles, gloves, and a mixing bucket.
4. Prepare the surface: Ensure that the surface where you will be installing the cultured stone is clean, dry, and free of any debris or obstructions. If necessary, apply a weather-resistant barrier or moisture barrier to protect the underlying structure.
Step 2: Installation of Cultured Stone
Now that you've completed the planning and preparation phase, it's time to start the installation process. Follow these step-by-step instructions to install cultured stone in your home:
1. Mix the mortar: Prepare a batch of mortar according to the manufacturer's instructions, ensuring that it has the right consistency for adhering the cultured stone to the surface.
2. Apply the mortar: Using a trowel, apply a layer of mortar to the surface where you will be installing the cultured stone. Make sure the mortar is evenly distributed and covers the entire area.
3. Place the cultured stone: Carefully place the cultured stone onto the mortar, pressing it firmly into place to ensure a strong bond. Use spacers to maintain consistent spacing between the stones and create a uniform look.
4. Cut the stone: If necessary, use a saw to cut the cultured stone to fit around corners, edges, or other obstacles. Wear safety goggles and gloves when cutting the stone to protect yourself from dust and debris.
5. Fill the joints: Once the cultured stone is in place, use a pointing trowel to fill the joints between the stones with mortar. Smooth out the mortar to create a seamless finish and remove any excess material.
6. Clean the surface: After the mortar has dried, use a brush or damp cloth to clean the surface of the cultured stone and remove any residue or debris. Allow the stone to dry completely before applying any sealant or finishing touches.
Step 3: Finishing Touches
Once the cultured stone has been installed, you can add the finishing touches to complete the look of your project. Here are some ideas for enhancing the beauty and durability of your cultured stone installation:
1. Apply a sealant: To protect the cultured stone from moisture, UV exposure, and other environmental factors, consider applying a sealant to the surface. Choose a sealant that is specifically designed for cultured stone and follow the manufacturer's instructions for application.
2. Add lighting: Enhance the visual impact of your cultured stone installation by adding lighting fixtures to highlight key features or create a warm ambiance. Consider installing LED strip lights, sconces, or spotlights to accentuate the texture and color of the stone.
3. Incorporate landscaping: To create a cohesive look between your cultured stone installation and your outdoor space, consider incorporating landscaping features such as plants, shrubs, or hardscaping elements. Use natural materials and textures to complement the aesthetic of the cultured stone.
4. Maintain the stone: To keep your cultured stone looking its best for years to come, follow a regular maintenance routine that includes cleaning, sealing, and inspecting the stone for any signs of damage or wear. Address any issues promptly to prevent further damage and preserve the beauty of your installation.
Conclusion
Cultured stone installation is a rewarding home improvement project that can enhance the beauty, durability, and value of your property. By following Roofing Slate -by-step process outlined in this guide and taking the time to plan, prepare, and execute the installation properly, you can achieve stunning results that will transform your space.
Whether you're looking to add a touch of elegance to your interior walls, create a striking focal point with a fireplace surround, or enhance your home's curb appeal with an eye-catching facade, cultured stone offers endless design possibilities and benefits. With its affordability, durability, and versatility, cultured stone is a smart choice for homeowners who want to elevate their home's style and character.
So, why wait? Start planning your cultured stone installation project today and take the first step towards transforming your home into a masterpiece of style and sophistication.